Often times, dorm rooms are slightly depressing and devoid of any personality. Décor options can be limited by dorm rules, but a table lamp adds a touch of style and brightens dark corners. Whether you're embracing dorm life for the first time or just embracing life on a budget, this simple DIY Bottle Lamp will leave you with a one-of-a-kind piece, while being easy on your bank account.
What you will need:
- GE Bottle Lamp Kit
(found at retailers like Walmart and Home Depot). - A bottle
- Lamp shade
- Harp kit
- Drill
- Diamond (or Glass and Tile) drill bit
- Sand paper
- Screw Driver
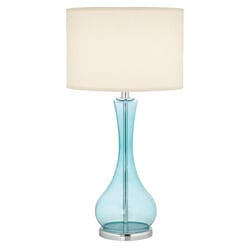
First, start by collecting your supplies. It is helpful to have an inspiration for the lamp you want to create before you go hunting for the base and shade. The inspiration for this tutorial is shown below. It is currently on sale for $138.91, but the DIY version only cost $35. Finding the base and shade at craft stores, discount stores, or even thrift stores can help cut down on the cost.
Once you have gathered all your supplies, you are ready to drill. This is the most time consuming part of the project and you will need to have patience to be successful. Drilling into glass isn’t like drilling into wood or metal. Glass is extremely temperamental and will shatter under too much force or heat.


Next, decide where you want the hole to be drilled. If there is a front to your bottle, you will want to drill the hole in the back so the cord will hang down behind the bottle. Also, you will want to drill towards the bottom of the base because the glass is more stable in this area. Once you know the location for your hole, cover the area with tape (we used painters tape). This will help stabilize the bottle to prevent cracking and help your drill bit gain traction on the otherwise slippery surface. Mark your hole on the tape for drilling and secure your base. We used a clamp to hold the bottle steady but you can use anything that holds it still.

Glass is a thermal material and holds heat easily. You will need to wet the area regularly (about every minute) throughout the process to help keep the glass from shattering. We used a water hose on a gentle setting to achieve this. Note: If you are using a corded drill, exercise caution during this step.
When you are drilling start by applying no pressure and have the drill on the slowest speed. Gradually increase the speed and pressure. Be extremely careful when you get close to breaking through the glass. The weight of the drill could fall into the bottle and cause it to break.

Always use safety gear when drilling on glass. Leather gloves and protective eyewear are a must. Once you are finished drilling and have cleaned off all glass shards you are ready to begin assembly.
Assembly
Step 1
Thread the exposed wire end of the cord up through the hole in the bottom of your bottle through the neck of the bottle. Leave about 3 inches of wire exposed.

Step 2
Next, select the adapter that fits snuggly into the bottle. Thread the lamp nipple into the adapter. Leave about ¼” to ½” exposed at one end. Put the locknut on the bottom end of the nipple and tighten. Then insert the adapter, locknut end first, into the bottle opening.


Step 3
Slide the check ring and harp bottom onto the nipple.

Step 4
Then screw the socket cap onto the nipple and tighten. The socket cap is on the far left in the picture below.

Step 5
Slit cord between conductors about 3 inches. Tie an Underwriter’s knot and connect the wires to their respective terminal screws by wrapping the wire clockwise around the screw head and tightening the screw. See here for a good illustration of how to tie and Underwriter’s Knot and connect the wires to the terminals. NOTE: The ribbed wire connects to the silver-colored terminal and the other wire connects to the brass-colored terminal.


Step 6
Place socket shell with cardboard insulator over the socket interior. Pull the cord through the bottle to remove any slack.


Step 7
Finally, connect the harp to the harp bottom and install your shade!

Voila!
You have a custom lamp to bring light and style to your room!
BONUS STEP!!
Learn how to turn this lamp into a SMART lamp and wirelessly schedule, dim and control lights from your phone >>

