 Whether you’re redesigning your living space or bringing home the new star of your entertainment center, the decision to mount your flat-screen TV on the wall can be daunting. In reality, it’s actually a pretty easy DIY project. In fact, we’ve broken it down into four basic steps. But first, it’s important to select the right TV mount based on your specific TV and how you want the mount to function in your space.
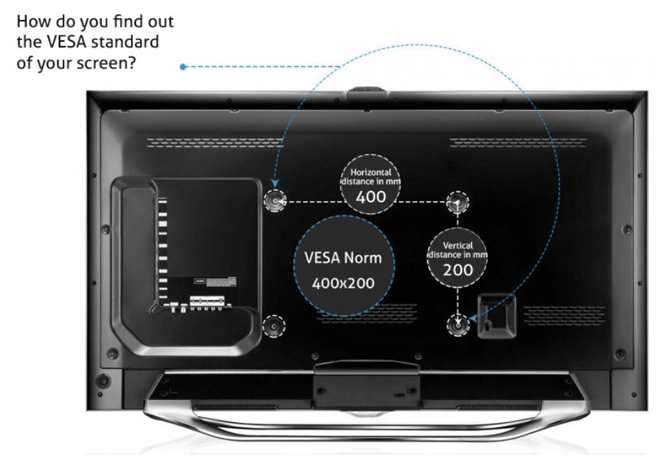
determine the dimensions, weight and VESA mounting pattern of your TV
You’ll want to select a wall mount that accommodates each of these factors. Keep in mind that the wall mounts weight limit is the combined weight of the TV and the mount. If you’re not familiar with the term VESA pattern, it refers to a standardized pattern of mounting holes located on the back of a flat-screen TV or monitor. The pattern starts at 100mm X 100mm for smaller displays and goes up from there. It’s important to make sure the VESA mounting pattern on your flat screen and your selected TV mount are compatible. To learn how to determine your TV's VESA pattern, check out this helpful graphic from VESA-standard.com.
A few extra features you may also want to look for in a TV mount are:
- An integrated bubble level
- A locking mechanism to secure your TV to the mount
- A cover to hide the bolts that attach the mount to the wall
- A cord-management hook to keep your TV cord and associated device cables tidy and under control
 Consider functionality
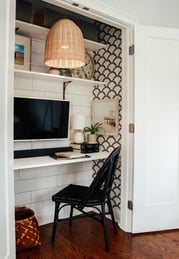
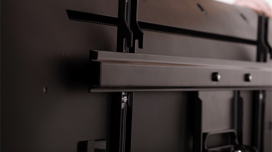
If space is limited and you don’t plan on adjusting the TV’s position, a fixed wall mount will work well and will hold your TV securely in place, close to the wall. This type of mount has a low profile and is perfect for tight spaces, such as this closet turned innovative work-at-home office from nestingwithgrace.com or this beautiful but narrow entertainment space from decoist.com.
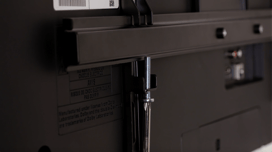
 Another low-profile option is a tilt TV mount. If your TV is mounted higher than eye level or there could be glare on the screen from the room’s lighting or a nearby window, the tilt TV mount will let you slightly tilt the TV up or down. Check the TV mount’s packaging or manual for the specific degree of tilt it accommodates. For example, this wall mount tilts up one degree and down three degrees for the best view.
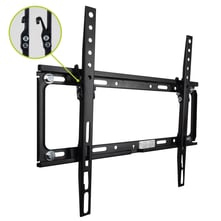
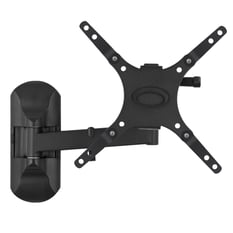
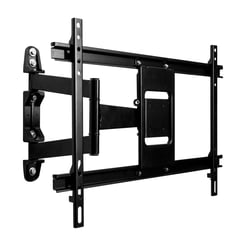
For a more open floor plan or if you have a large entertainment space, the flexibility of a full-motion mount is just the ticket. Easily tilt the TV up or down, extend it out from the wall and swivel it from side to side for whatever gives you the best view. Talk about versatility! Just be certain the TV mount you purchase is compatible to the size of your TV, since extending the TV away from the wall creates added weight and stress on the mount. Check out these full-motion mount options.
Full-motion for smaller TVs Full-motion for larger TVs
Install your TV wall mount
Now that you’ve chosen the best TV mount for your entertainment space, let’s address the tools you’ll need, as well as the basic steps required for mounting your TV. You may want to have a friend help you with this DIY project — especially if you’re mounting a larger flat screen.
NOTE: Installation varies by TV mount, so be sure to follow the manufacturer’s instructions included with your specific TV mount.
The basic tools you’ll need:
- Phillips-head screwdriver
- Bubble level (If not already integrated into the TV mount)
- Ratchet
- Electric or portable drill
- Drill bit
- High-quality stud finder
Step 1: Prepare the wall.
TV wall mounts can be installed on drywall, brick or concrete surfaces. For drywall, use a stud finder to locate one or two wall studs, depending on the design of the TV mount, and mark the exact center of each stud. For brick or concrete, you’ll need to use a masonry bit and concrete anchors. In either case, you will:
- Hold the mount against the wall, making sure it’s level, and then mark each hole location centered on the stud, brick or concrete.
- Drill a pilot hole at each marked location. Then, for brick and concrete walls, use a hammer to tap a concrete anchor into each hole.
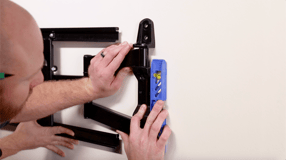
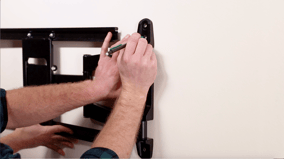
Step 2: Secure the TV mount to the wall.
- Align your TV mount with the pre-drilled holes and secure it to the wall with the hardware that came with your TV mount.
- Use a bubble level to confirm the mount is level.

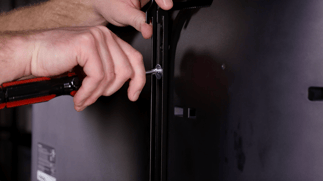
Step 3: Attach the mounting arms or mounting plate to your TV.
- Place the mounting arms or mounting plate against the back of your TV and align the holes.
- If your TV has a large VESA mounting pattern, you may need to add the extension adapters that came with the mount.
- Do not lay your TV face down during this step, as it may harm your TV’s screen.
- Attach each mounting arm or the mounting plate to your TV using the hardware that came with your mount.
- If the back of your TV has a slight curvature, you may need to insert spacers between the TV and the mounting arms.
- Spacers should be included in the hardware kit that came with your TV mount.
Step 4: Secure your TV to the wall mount.
- Carefully lift your TV and hook it onto the mount you previously attached to your wall. Just make sure your mount and the added weight of your TV are secure before fully letting go.
- Tighten any safety screws to secure your TV in place.
That’s it! Please keep in mind, however, that when you’re ready to install your TV wall mount, you should follow the specific instructions that came with it. And, if you’re still uncomfortable with mounting it yourself, there’s no shame in contacting a professional to take care of it for you. Either way, once your TV is mounted and in place, you can adjust it to the perfect viewing angle, grab the popcorn and stream your favorite movies and shows — all to your heart’s content.
MORE LIKE THIS
BIAS LIGHTING 101: GET MORE FROM YOUR HOME ENTERTAINMENT WITH BACKLIGHTING
HOMEGATING FOR THE WIN: HOW TO UPGRADE YOUR HOME ENTERTAINMENT CENTER
DIY ROUNDUP: OUR BEST HOW TO'S FOR AROUND THE HOME