Whether you are renovating, establishing a new look, or simply looking for ways to enhance your existing décor, the Enbrighten Ceiling Lights are perfect for lighting up entryways, hallways, living areas, dining rooms, bedrooms, and much more. Assembling the fixture only takes a few steps, so don’t let the idea of upgrading your lighting be too daunting.
Replacing your current fixture is an easy DIY project that'll transform your home with a little elbow grease and just 11 easy steps.
INSTALLATION
There really are no special tools required for this project, a Philips-head screwdriver is as high-tech as required tools get. Although, personally we used a hand-held drill to shorten the process. Now, let’s address the basic steps required for installing your new fixture.
Step 1: Turn Power OFF
Ensure that power is turned off at the Circuit Breaker or Fuse Box.
.jpg?width=174&name=MicrosoftTeams-image%20(14).jpg)
Step 2: Remove Old Fixture
Remove the old fixture that is currently installed. This also includes removing the mounting bracket, as you will be installing a new mounting bracket in the next step!
.jpg?width=174&name=MicrosoftTeams-image%20(12).jpg) Step 3: Install Mounting Bracket
Step 3: Install Mounting Bracket
Secure the new mounting bracket onto your ceilings junction box with the included mounting screws.
%20copy%203.jpg?width=174&name=MicrosoftTeams-image%20(10)%20copy%203.jpg)
Step 4: Neutral and Live Wires
Using the wire nuts (included) connect the white fixture wire to the white (neutral) wire from the ceiling. Then using a wire nut, connect the black fixture wire to the black (live) wire from the ceiling.
Step 5: Grounded Wire
Connect the grounded wire from the ceiling to the grounded wire from the fixture with the orange wire nut (included) or the ground screw (included). Tighten the screw to ensure that both wires are secure.
Step 6: Secure Wiring
Gently arrange all wiring inside the junction box, making sure that there are no exposed connections.
*Safety Tip: Wrap electrical tape (not included) around the wire nuts to ensure that they are secured.
%20copy%203.jpg?width=174&name=MicrosoftTeams-image%20(12)%20copy%203.jpg) Step 7: Attach Canopy
Step 7: Attach Canopy
Align the Canopy with the pre-installed screws on the mounting bracket and fasten it into place using the two-cylinder nuts. Ensure that the canopy is flat against the ceiling.
Step 8: Insert Stem
Thread the stem onto the canopy and tighten it into place. Depending on the fixture being installed, the length of the stem may be up to you!
Step 9: Insert Bulbs
Thread the included bulbs into their sockets.
%20copy.jpg?width=174&name=MicrosoftTeams-image%20(12)%20copy.jpg)
Step 10: Install Glass Shade
Seat the glass shade onto the canopy so that the stem extends out of the small opening. Place the rubber washer and the flat metal washer over each other, securing them using the hex nut. Put the cap over the hex nut at the end of the stem.
Step 11: Turn ON Power
With the fixture installed, restore power at the circuit breaker or fuse box.
That’s it! Please keep in mind, however, that when you’re ready to install your Ceiling Fixture, you should follow the specific instructions that came with it. And, if you’re still uncomfortable with installing it yourself, there’s no shame in contacting a professional to take care of it for you. Either way, once your Ceiling Fixture is installed, you can provide your space with a new stylish ambiance.
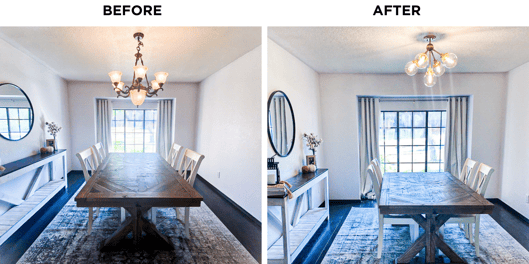
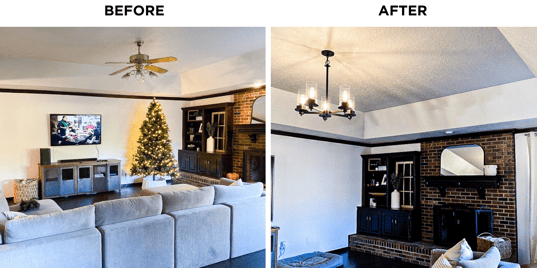
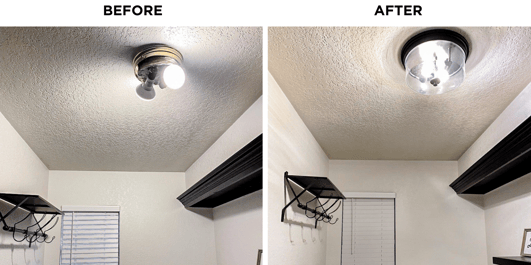
See More Before and Afters of Enbrighten Ceiling Lighting Below